This checklist walks you through every task you need to complete before opening your Local Line store to customers. Work through it in order — each section builds on the last, so skipping ahead can cause issues later.
Set aside roughly 2–4 hours total. You can save your progress and come back at any time.
1. Configure your account
Before adding anything to your store, make sure your account foundation is solid.
- Complete your business profile in Settings (name, address, contact info, logo)
- Confirm your subscription tier and billing preferences.
- Invite your team members who'll help manage your account.
For step-by-step instructions, see Setting up your Local Line account.
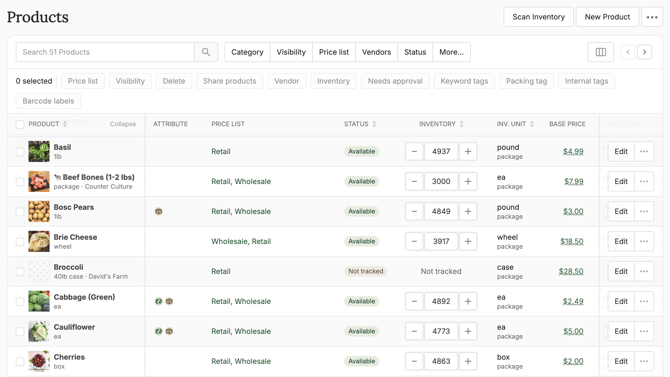
2. Add your products
Your product list is the core of your store. You can add products one at a time or in bulk using our product export & import spreadsheet.
- Add at least one product to test the workflow.
- Set pricing and unit of measure (per lb, per item, per bunch, etc).
- Upload up to five product photos.
- Set inventory levels, either for the entire product or for the individual packages within it.
- Define any product taxes.
- Once comfortable, bulk import your full product list by clicking 'Import Products' in the three-dot button at the top right of the 'Products' tab.
3. Set up payment methods
Decide how you'll accept payment from customers. Set this up in the 'Payment' tab. This is also where you can set up coupons.
- Connect an online gateway if you want to accept credit card or ACH payments.
- The three online gateway options are: LocalPay, Square, and Stripe.
- Add any offline payment methods like cash or check.
- Set which payment methods should be available on your price lists.
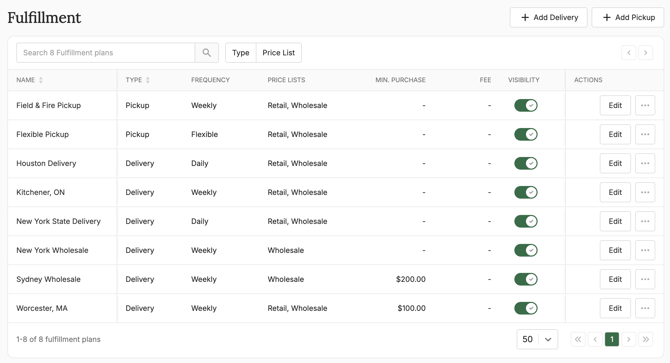
4. Set up fulfillment plans
Fulfillment plans are delivery and pickup plans that customers can choose from when placing an order. Set these up in the 'Fulfilment' tab.
- Add at least one delivery location, pickup location, or shipping option.
- Add the delivery zone or pickup address and set the schedule type (scheduled or flexible).
- Define your fulfillment days and set order cutoff times.
- Set minimum order amounts (if applicable).
- Define delivery fees or pickup instructions.
5. Build your price lists
Price lists control what each customer or group of customers sees and pays. Set this up in the 'Price Lists' tab.
- Create at least one price list.
- Define your price list type.
- Link the relevant fulfillment plans.
- Link the payment methods you want available on the price lists.
- Input any desired storefront message, cover photo, and product tile display.
- Review your price list SEO display.
- Adjust your visibility settings.
- Add products to the price list
- Click 'Products', then 'Add Products' in the top right of the page.
- Organize products into categories.
- Click 'Edit Categories' in the top right to create and manage categories.
- Select products using the checkbox on the left side of the table.
- Click 'Add/remove from category' and select the category you want those products placed in.
- Apply any price adjustments (wholesale discounts, member pricing, etc) using the 'Price Adjustment' toggle in the table.
- Ensure your price list is open so customers can place orders. Do this in your Price List settings.
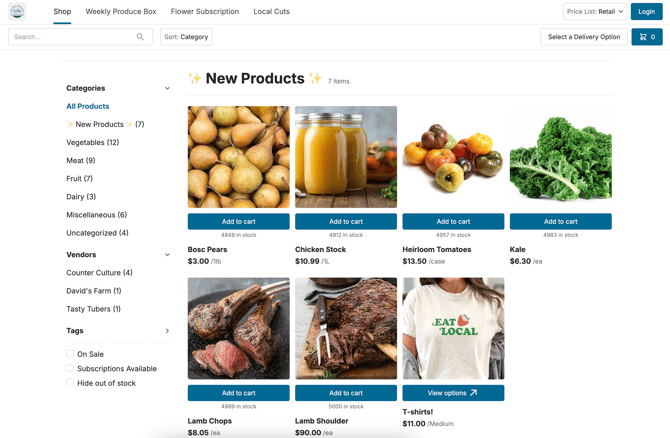
6. Design your storefront
Your storefront is what customers see when they visit your price list URL. Click on 'Storefront' to begin customizing the look and feel of your store.
- Store info: complete any missing contact information, input your social media links, and add your Terms of Use that customers must agree to when doing business with you.
- About us: an optional page on your Local Line store that gives a history of your business and tells customers more about you.
- Customization: customize your storefront colors, font, and navigation links.
- Settings: set notification preferences, checkout settings, and add your google and facebook pixel tracking links (if applicable).
- Click the green 'Save' button on the bottom right.
If you'd like to view how your storefront looks from a customers perspective, click the box + arrow icon next to the Storefront tab.
7. Add your customers
If you have existing customers, add them now so they be sent an invite and place an order.
- Import in bulk or add customers manually.
- Assign each customer to the appropriate price list(s).
- Send login invitations to customers who'll be ordering from you online.
8. Test the full ordering flow
Before going live, place a test order yourself.
- Go to your storefront link and add an item to your cart.
- Register as a customer yourself using a different email address than the one you use for your Local Line account.
- Complete the checkout and place your order.
- Verify that the order appears correctly in your 'Orders' tab.
- Verify that the confirmation emails were received (one for the customer and one for you).
9. Launch your store
When everything is completed and your test order was successful, you're ready to launch your store!
- Go to Price Lists and toggle them to 'Open' and 'Active'.
- Share your price list URL with customers, either using LocalLine's in app email system or using your own (ex: Mailchimp).
- Announce your launch via social media, newsletters, and on your website.
What's next
With your store live, focus shifts to day-to-day operations:
-
Managing orders - processing, editing, and fulfilling incoming orders.
- Pick & pack lists - streamlining your fulfilment days.
- Reports - tracking sales, customers, and product performance.
Need extra help launching? Contact support@localline.ca or use the chat in the bottom right of this page for further assistance.