Connections
Create and manage connections as as hub
- Filter products by vendor
- Edit a vendor
- Disable a vendor
- Delete a vendor
- Export vendors
- Export a pick list or hub & vendor orders
- Vendor reporting
- Vendor payout export
- Vendor subscription billing
- Vendors on your storefront and orders
Manage connections as a vendor
- Accept an invite to connect
- Share products with a hub
- Apply a markup to shared products as a vendor
- Export a pick list or orders list as a vendor
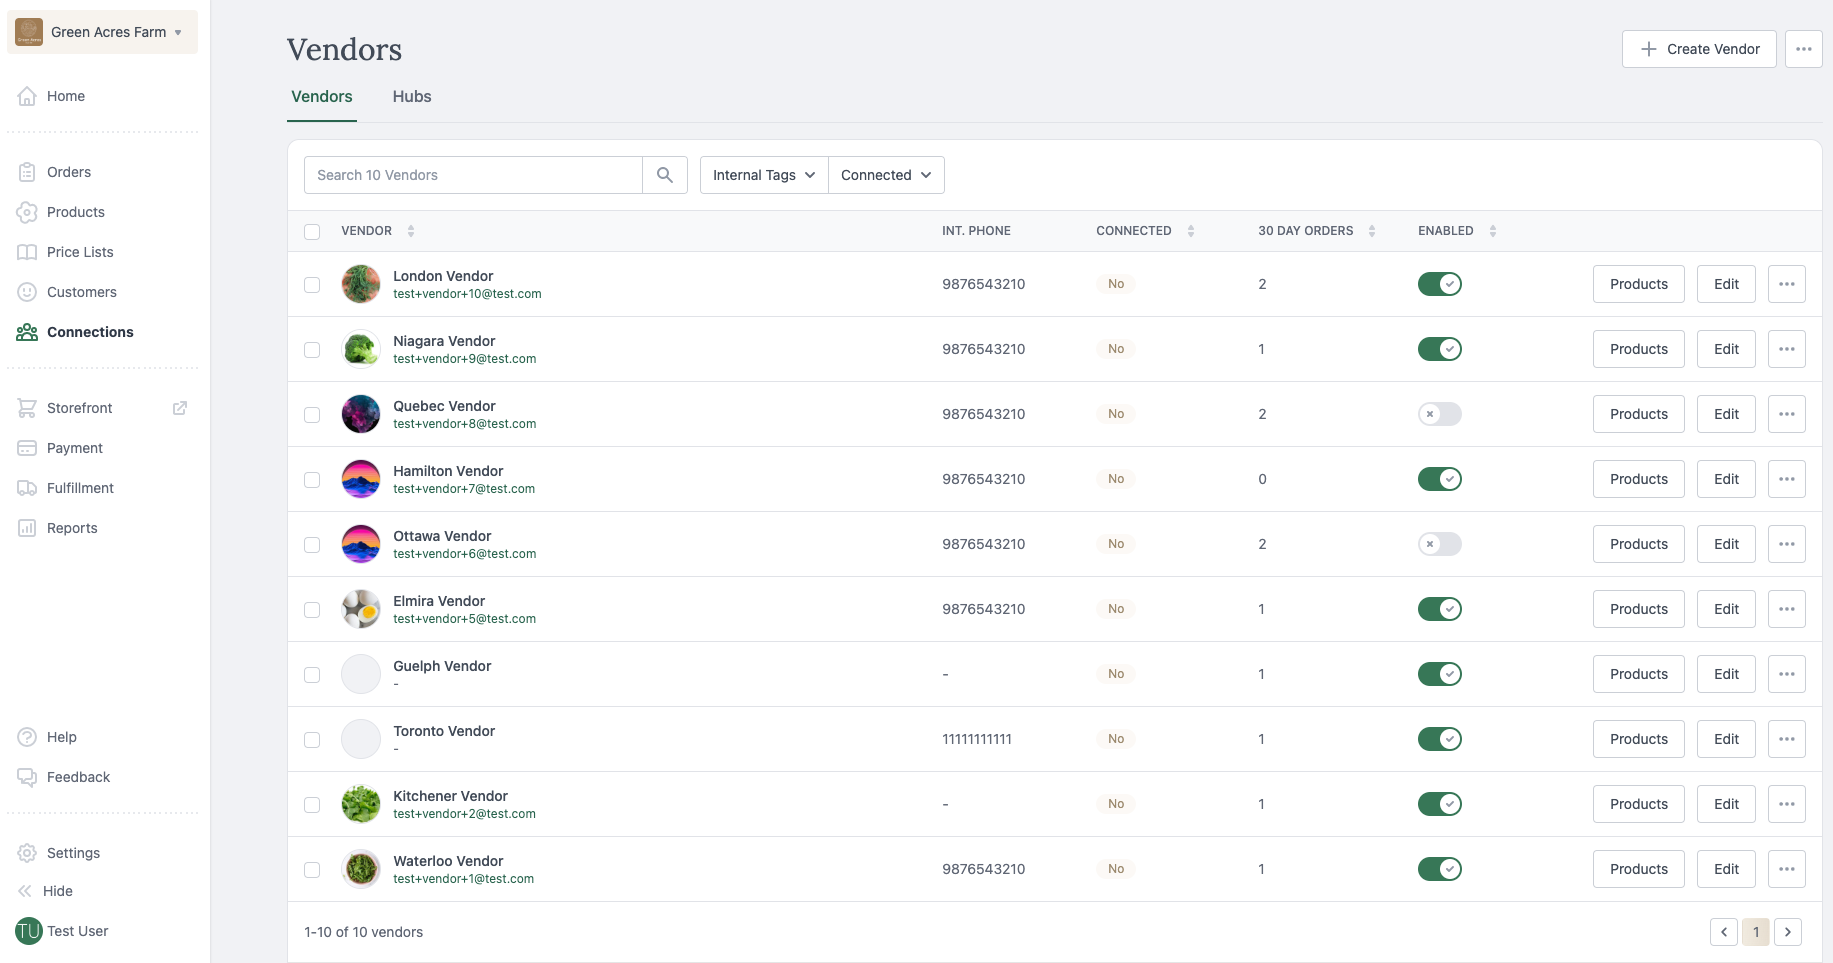
Connection types
Whether you run a traditional food hub or are thinking of sprouting a neighbourhood farm co-op , we have you covered with Connections. Connections enables farms to connect with each other, and with hubs to collaborate on selling local products online. There are two types of connections; managed and connected.
Core, Premium and Ultimate subscription plans include the Food Hub add on which has a certain number of vendors allotted. You can also add vendors to any plan for an extra cost per vendor. See our pricing page for details.
Vendors are subscribed to the Base plan which allows the following:
- Inventory management
- Unlimited products
- 2 users
- Access to one hub storefront
If the hub a vendor is connected to has the Advanced Inventory add on then their vendors also have that feature.
If a vendor wants to have their own storefront they must upgrade to a paid account.
Managed
A managed connection is created when the hub adds a vendor in their Local Line account. The hub oversees adding and managing vendor products and inventory, and the products are only available to buy on the hub storefront. The vendor does not need to have a Local Line account.
Managed vendors do not receive order emails. Instead, you can send them an order export with the details they need to fulfil an order.
Connected
A connected, or shared connection, is created when the hub invites a vendor to create a Local Line account if they have not already, and to share their products via Local Line with them. A connected vendor can sell their products directly on their own storefront and connect with multiple hubs.
After the vendor accepts the invite and shares their products, the hub can customize how the vendor is displayed in their storefront, and can edit these product details:
Note: If the hub changes a shared product name, description or images, any changes a vendor makes to those details after that are not synced to the hub account.
- Product name
- Keyword tags
- Description
- Add images
- Price list assignment
- Back office internal product ID
- Back office tags
- Enable or disable the needs approval feature
Any changes the hub makes to the product are only applied in the hub account and not in the connected vendor account.
The vendor exclusively manages product inventory amount and visibility settings in their account. For example, if the vendor opts not to track inventory for a shared product, the hub cannot enable inventory tracking on that product, and vice versa. If the vendor has marked the product as not visible in their account, that is applied to the hub account.
The vendor can apply a price adjustment to their shared products to add a markup on the sale to the hub. The hub can also apply a price adjustment to add a mark up on the sale to their customer.
When a shared order includes a product that needs approval, both the vendor and hub have the ability to update the product quantity in their Edit order view, which updates the quantity in the other party's view. But, only the hub can approve the order and change its status from Needs approval to Open (or any other status, like Cancelled or Closed).
When a hub vendor updates a shared order, an email is sent to the hub to notify them.
The hub can specify which information they want to share with the vendor, such as:
- The ability to view orders in their Local Line account (as opposed to emailing the vendor a pick or pack list). This ability is enabled by default.
- The ability to see the hub’s customer name (instead of the hub’s name). This ability is disabled by default.
- The ability to see order fulfillment details. This ability is disabled by default.
Create and manage connections as a hub
Managed vendors
Use this guide if you are a Hub that directly manages your vendors’ products and inventory.
Vendors are created and managed from the Connections page where you can search for vendors and filter by tags you assign to them.
Create a vendor
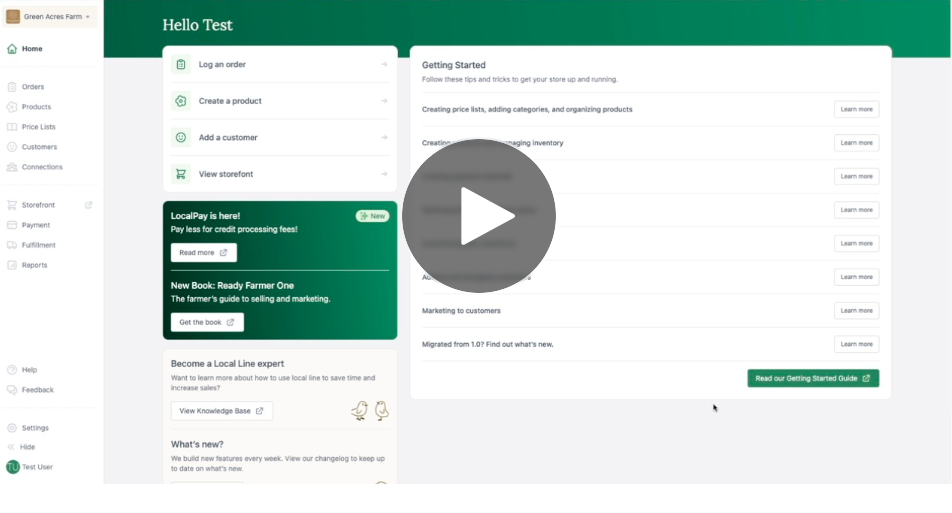
- Go to the Connections page.
- Click Create vendor.
- Specify Storefront display info.
- [Required] Enter the vendor’s name.
- [Optional] Enter a Description. You can make text bold, italic or underlined, and add lists, hyperlinks and emojis.
- [Optional] Enter the vendor’s Website.
- [Optional] Enter the vendor’s Location.
- [Optional] Enter the vendor’s Contact phone number.
- [Optional] Enter the vendor’s Email.
- [Optional] Enter any Certifications the vendor has. Type the certification name then click Create “certification name” to save it.
- [Optional] Add a Logo or Profile photo. Click Upload image to select the image file.
- Add Back office details. This information is only displayed to you in your back office.
- [Optional] Enter a First name for the vendor.
- [Optional] Enter a Last name for the vendor.
- [Optional] Enter an Internal contact phone number for the vendor.
- [Optional] Enter an Internal contact email for the vendor.
- [Optional] Enter an Internal address for the vendor.
- [Optional] Enter an Internal tag for the vendor. Type the tag name then click Create “tag name” to save it.
- [Optional] Enter Vendor notes. You can make text bold, italic or underlined, and add lists, hyperlinks and emojis.
- Click Save. By default, the vendor is disabled. To enable the vendor, click the Enable toggle next to the vendor in your Vendors table. An enabled vendor occupies a vendor seat in your subscription, and products can only be assigned to an enabled vendor.
Import vendors
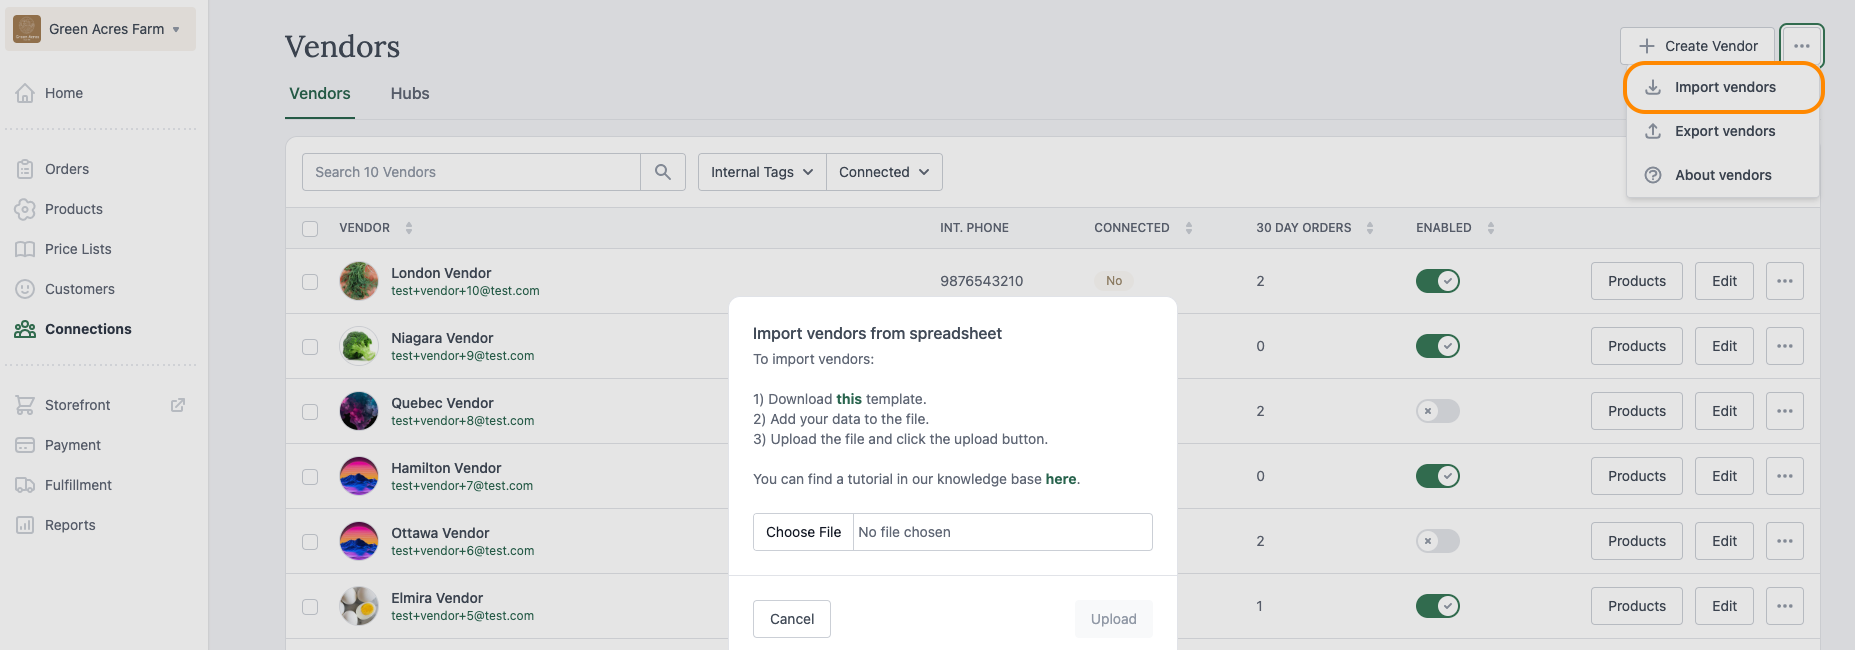
You can import all vendor fields except for Certifications and Tags.
You can import a maximum of 250 vendors at a time.
- Go to the Connections page.
- Click the dot menu in the top right.
- Click Import vendors.
- Click Download this template.
- Add the details to the template file and save it.
- The only required field is Vendor (name). If you have vendors using the same name
- If you leave the Enabled column blank the imported vendors are enabled by default.
- Click Choose file and then select the template file.
- Click Upload. By default, the vendors are disabled. To enable a vendor, click the Enable toggle next to the vendor in your Vendors table. An enabled vendor occupies a vendor seat in your subscription, and products can only be assigned to an enabled vendor.
Assign a vendor to a product
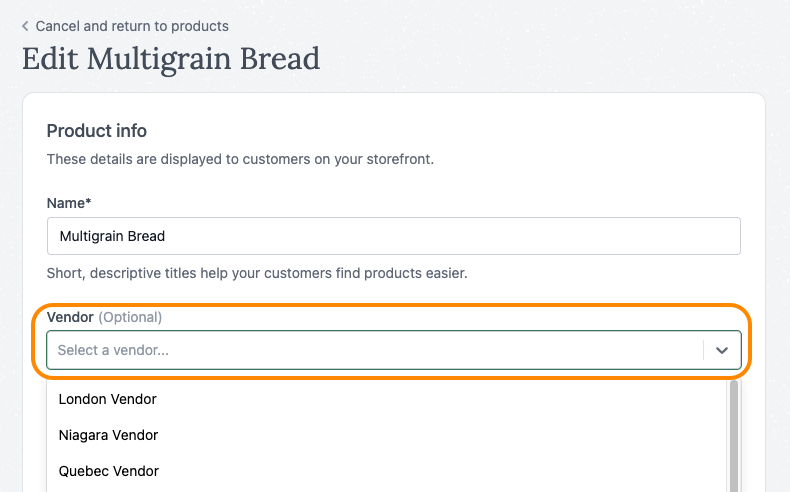
- Go to the Products page.
- Click the dot menu for a product.
- Click Edit product.
- In the Vendor space, select the vendor from the dropdown menu.
- Click Save.
Remember to assign your products to a price list if you have not already done so.
Assign a vendor to products in bulk
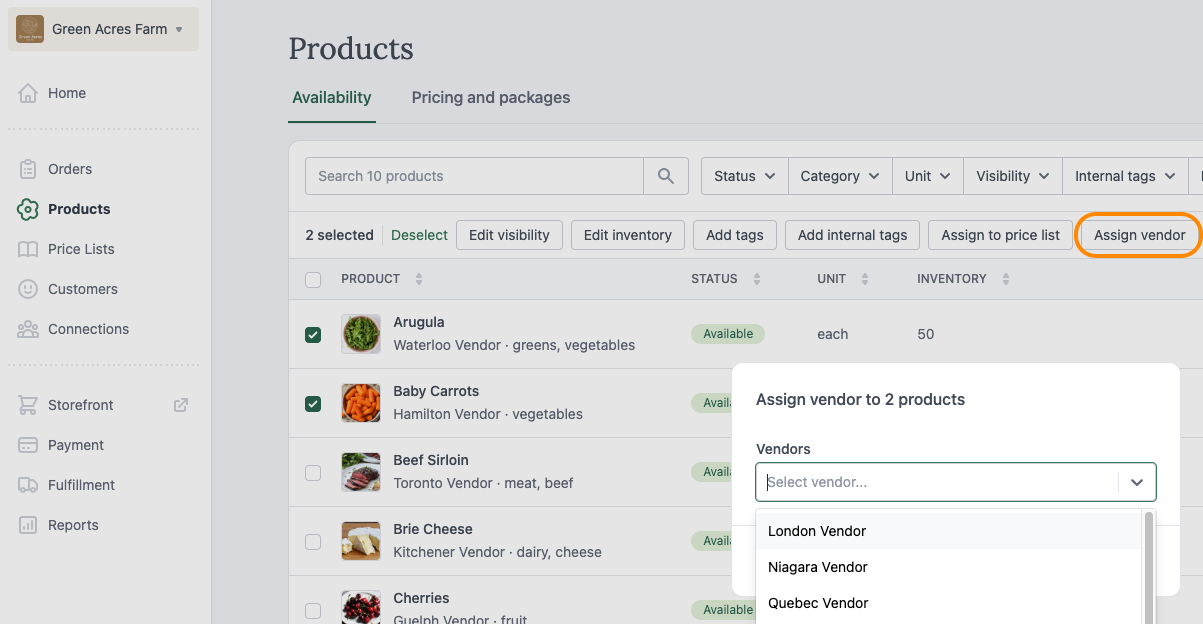
- Go to the Products page.
- Check the box to select all products or manually select the products you want to assign.
- Assign vendor.
- Select the vendor in the list.
- Click Save.
Remember to assign your products to a price list if you have not already done so.
Connected vendors
Invite a vendor
- Go to the Connections page.
- Click Invite vendor.
- Enter the Vendor email.
- Click Request connection.
The vendor receives an email notification with a direct link to Connect by creating a Local Line account or by logging into their existing account.
When a vendor accepts your invitation, they are disabled in your back office until you enable them from your Connections table.
Find new products your vendors add
No email is sent to you when your vendor shares a product with you. Take these steps to find which new products they have shared.
- Go to the Products page.
- Click the Price lists filter.
- Select No price list assigned.
Then, assign them to a price list so they display on your storefront.
Assign shared products to a price list
For shared products to display on your storefront, you must assign them to a price list and categorize them. If you have not already done so, first add a price list.
- Go to the Products page.
- Select the products you want to assign to a price list. You may want to use the vendor filter.
- Click Assign to price list.
- Check the box next to the price list(s) you want to assign the products to.
- Click Save.
- Categorize the products in your price list. Uncategorized products do not display in your storefront.
Apply a markup to shared products as a hub
You can apply price adjustments to an individual product or in bulk.
Manage price list sharing settings
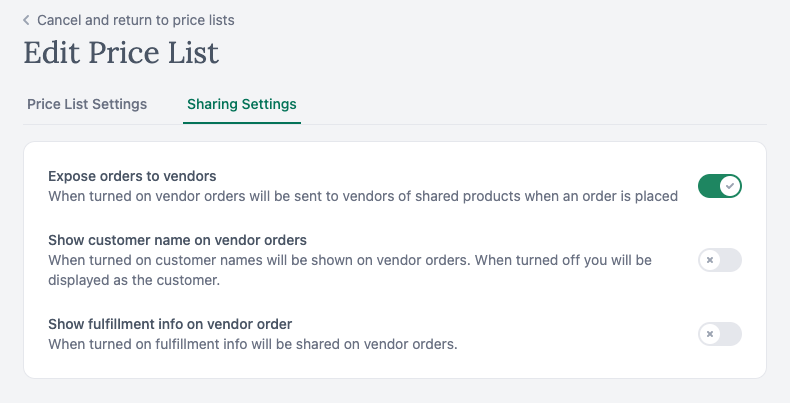
You can specify which information you want to share with your vendor(s).
- Go to the Price lists page.
- Click the dot menu next to the price list you want to update sharing settings for.
- Click Edit settings.
- Click the Sharing settings tab.
- Adjust the settings as needed:
- Expose orders to vendors (enabled by default) - as opposed to emailing the vendor a pick or pack list)
- Show customer name on vendor orders (disabled by default) - otherwise the hub name is displayed to the vendor.
- Show fulfillment info on vendor order (disabled by default).
- Click Save.
Filter products by vendor
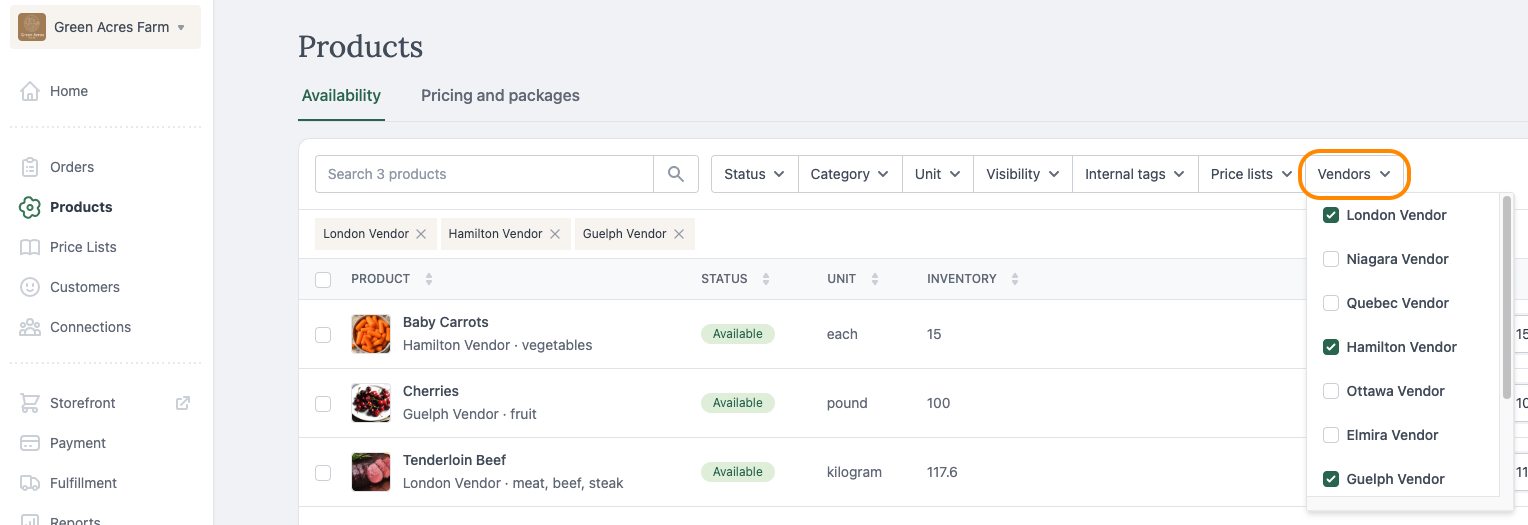
The Vendors filter only displays on your Products table if you have created a vendor.
Or, on the Products page, click the Vendors filter and select which vendor’s products you want to view.
Edit a vendor

- Go to the Connections page.
- Click Edit next to the vendor you want to edit.
- Make the needed changes then click Save.
Disable a vendor

When you delete or disable a vendor it removes them from occupying one of the vendor seats you have available in your subscription. See Vendor billing for more information.
When you disable a vendor, the vendor is unassigned from their products and their visibility in any assigned price list is disabled. Also, no products created can be assigned to a disabled managed vendor. The vendor is not shown on your storefront.
- Go to the Connections page.
- Click the Enabled toggle for a vendor to disable them.
When you re-enable a vendor their products are made visible, the price list assignment is restored, and the vendor is displayed on your storefront.
Delete a vendor

When you delete or disable a vendor it removes them from occupying one of the vendor seats you have available in your subscription. See Vendor billing for more information.
When you delete a vendor, the vendor is unassigned from their products and their visibility in any assigned price list is disabled.
- Go to the Connections page.
- Click the dot menu next to the vendor you want to delete.
- Click Delete vendor.
- Click Delete to confirm. Doing this removes the connection between the vendor and the product only. The product remains on your Products page and visible in your price lists unless you remove it from the price list or make disable .
Export vendors
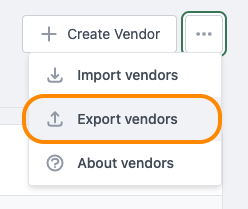
- Go to the Connections page.
- Click the dot menu in the top right.
- Click Export vendors.
Export a pick list or vendor orders
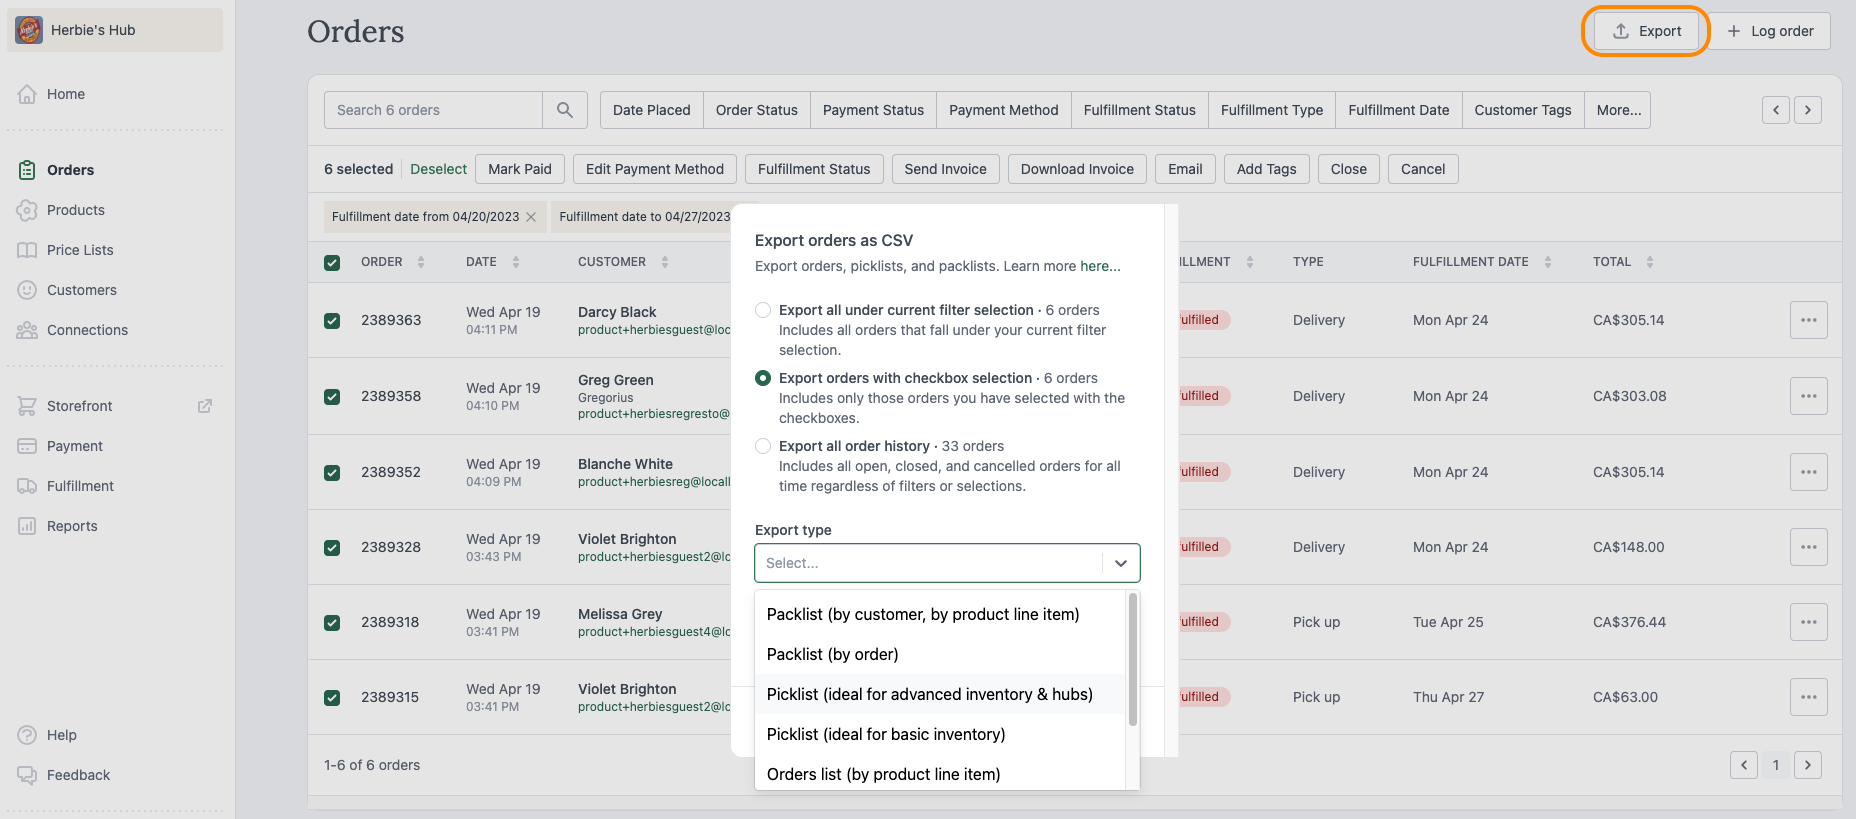
You can export a pick list for your vendors and email it to them if they are a managed vendor, or if you have not granted that sharing permission to your vendor.
There are some differences between 1.0 and 2.0 order exports. The differences are:
- Additional data points
- Different column ordering
- Minor terminology changes (e.g. price list instead of catalog)
See Orders in 2.0 for how to export the data.
If you previously used Local Line 1.0, here is a comparison of how exporting vendors differs between the versions. The key difference is that you filter by vendor after export instead of before. The ability to filter within a spreadsheet is supported by Excel, Google Sheets, and Numbers.
Vendor reporting
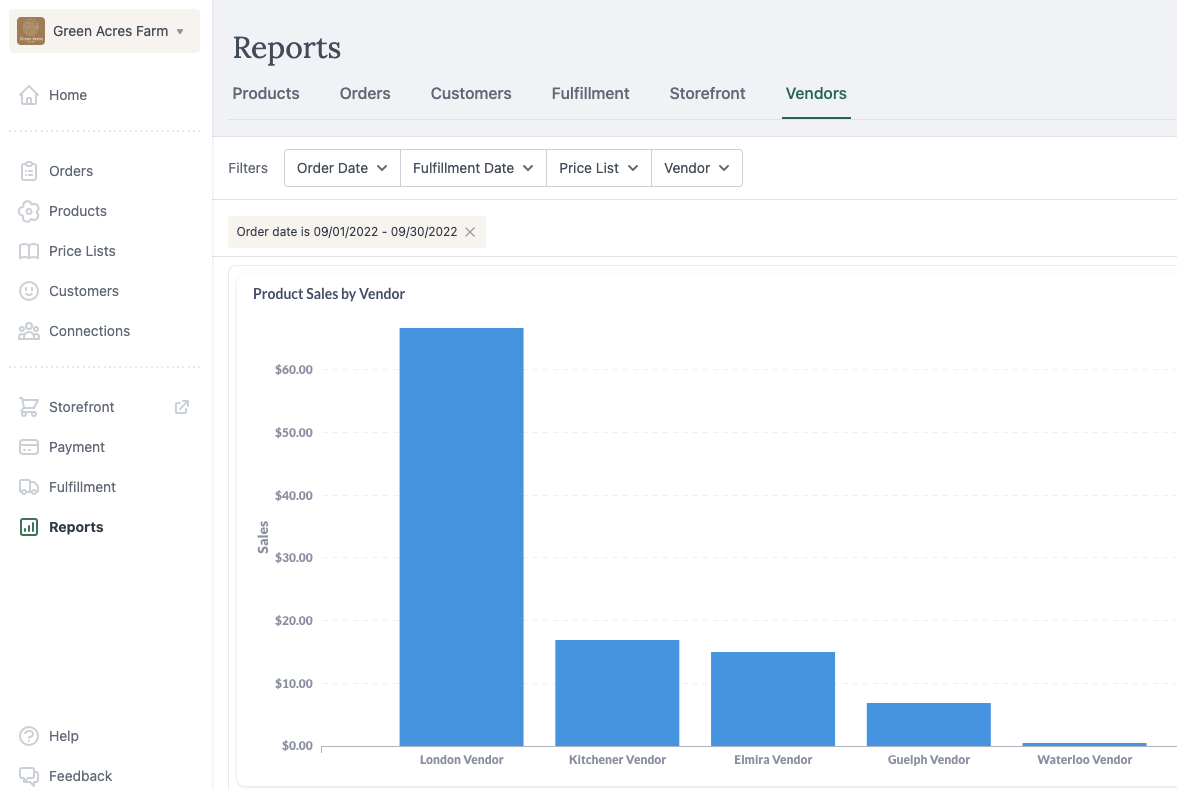
The Reports Products tab includes a filter for Vendor, and more metrics are available on the Vendors tab:
page- Active vendors
- Sales by vendor - Top 10
- Sales by vendor table view
- Most profitable products - coming soon!
Vendor payout export
You can Vendor order totals (payout) file which outlines what is owed to each vendor.
The export calculates the product base price (before any price adjustments are applied) as the amount to pay managed vendors.
Vendor subscription billing
If you have a Core, Premium or Ultimate subscription plan then a certain number of vendors is included. If you want to exceed your plan's vendor allotment, it is an extra charge per vendor based on your billing cycle (monthly, semi-annual or annual). See our pricing page for full details.
You can reduce the number of vendors in your subscription from the Subscription tab on your Settings page. If that is done midway through your billing cycle, your invoice is prorated based on that change. When you delete or disable a vendor, it does not change the number of vendor seats in your subscription, it just removes a vendor from occupying one of those seats.
Vendors on your storefront and orders
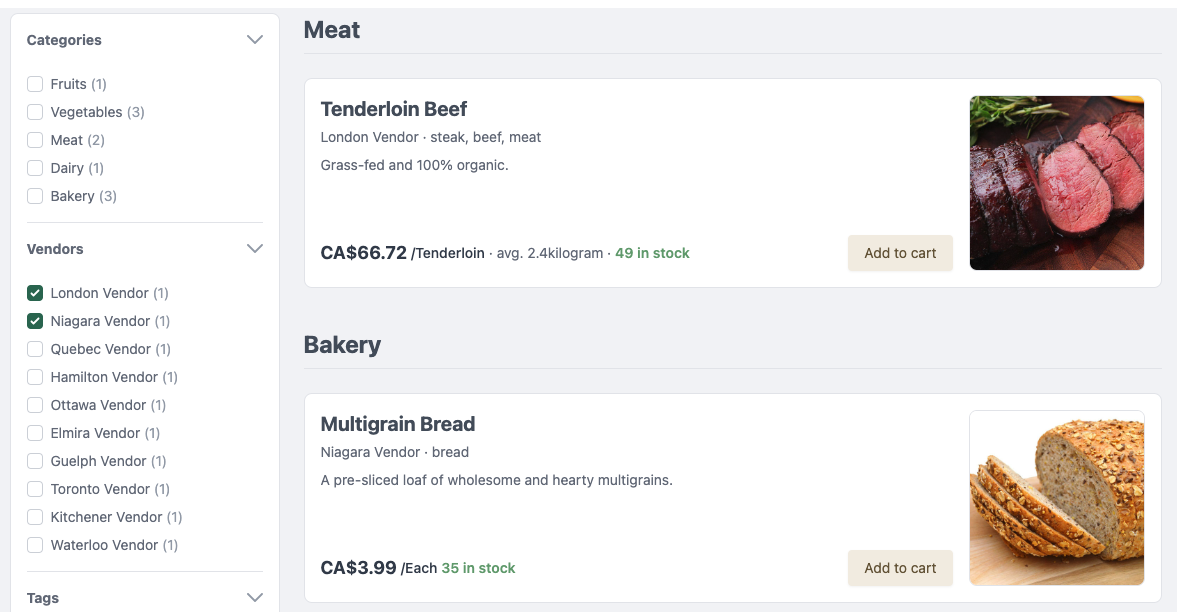
When you have active vendors they are displayed as filters on your storefront. The vendor name is also displayed in the product list.
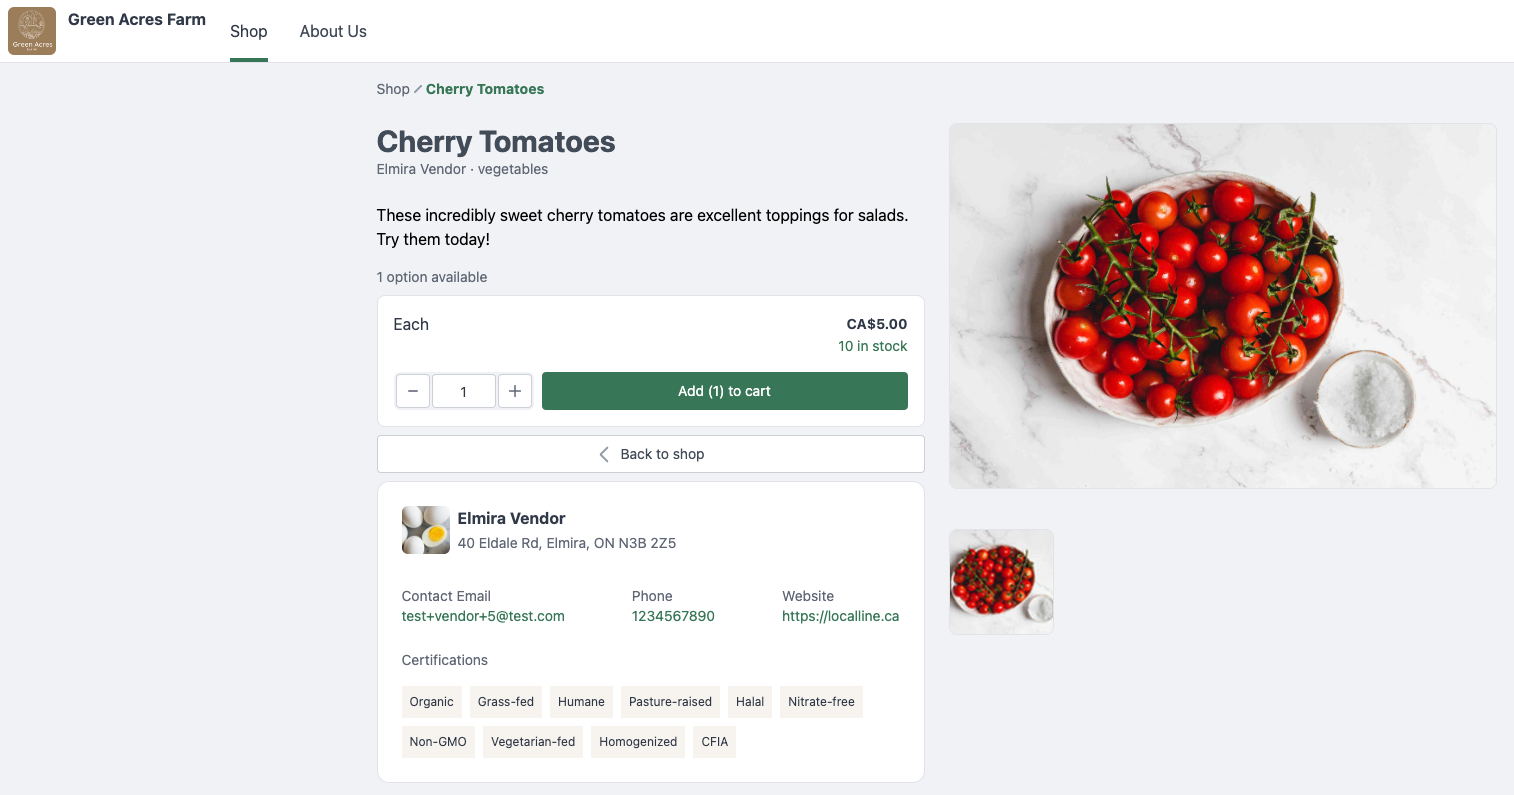
Any additional details you have specified about them in your back office are shown in the product detail view when a user clicks on a product.
Manage connections as a vendor
To become a connected vendor you must first be sent an email invite from another Local Line farm or hub.
Accept an invite to connect
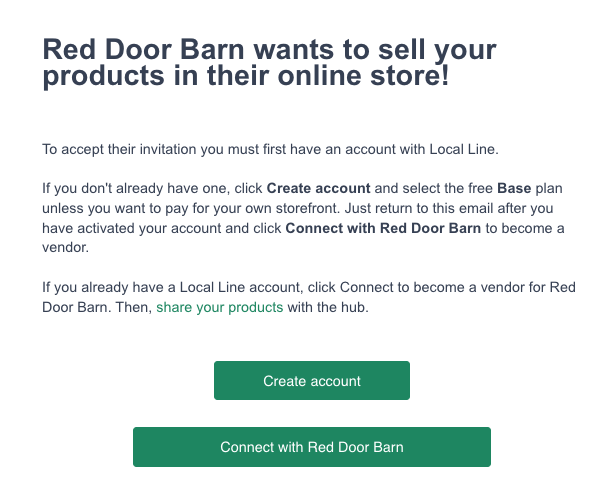
In the email notification you receive, click Connect.
If you already have a Local Line account, enter your log in details and click Connect account.
If you do not already have a Local Line account, click Create one here, then select the Base subscription plan for $0 by clicking Get started, and follow the prompts to complete your account set up. After you have finished creating your new account, you will need to click the "Connect" button from the original invite email in order to get connected. Now you can add your products and share them!
Share products with a hub
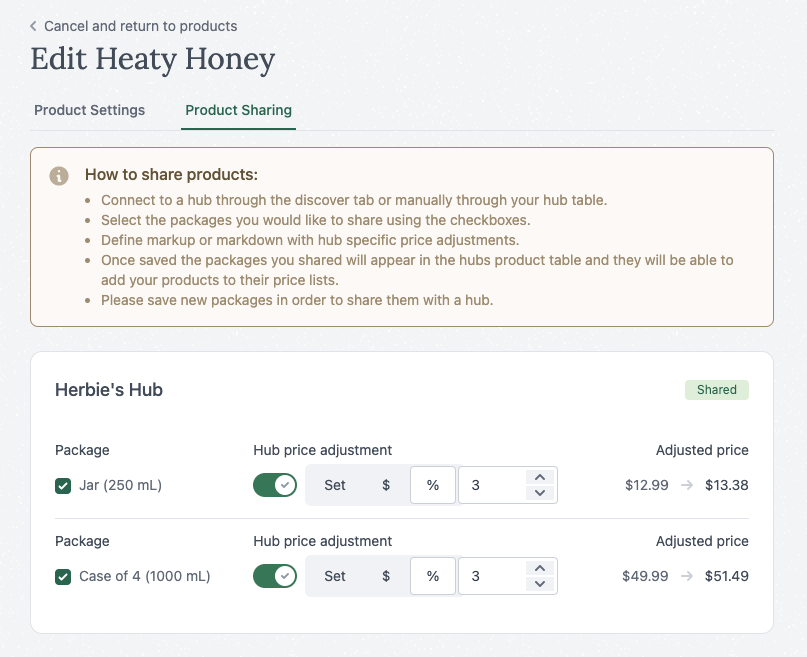
Share products individually
You can choose to share at the package and product level.
- On the Products page, click the dot menu for a product.
- Click Edit product.
- Click the Product sharing tab.
- If applicable, select all package sizes you want to share.
Share products in bulk
When you use this option, all product packages are also selected and any markup you specify applies to all selected products.
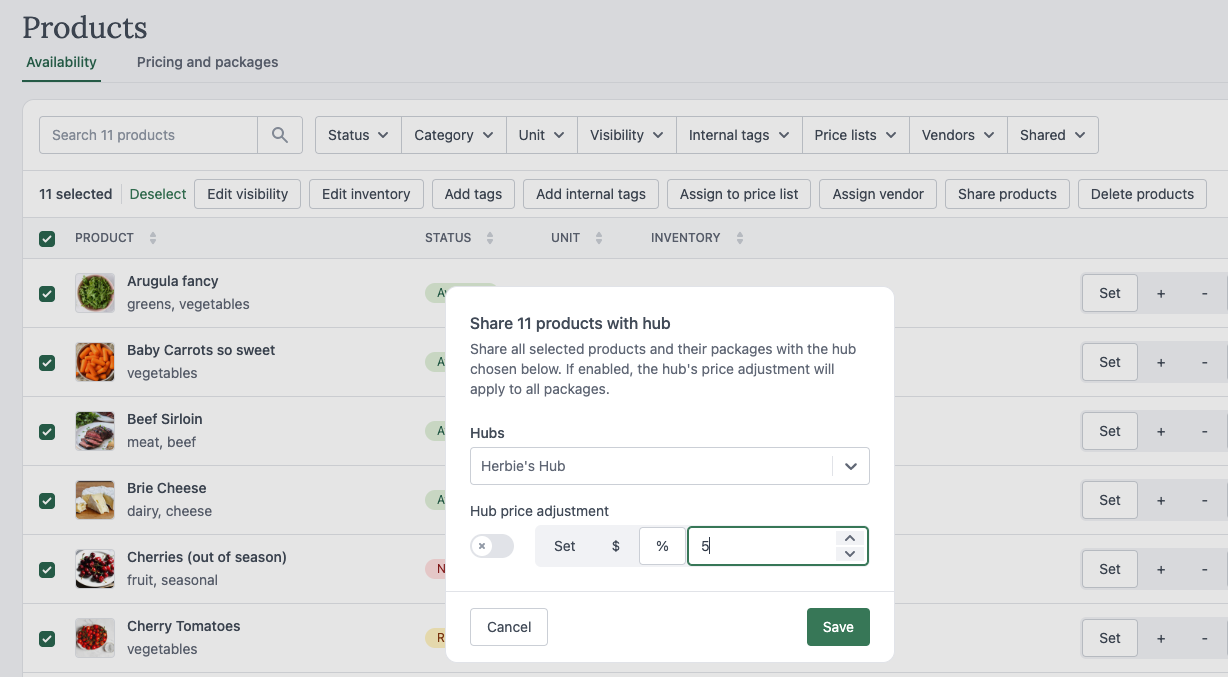
- On the Products page, click to select the products you want to share.
- Click Share products.
- Select the hub you want to share the products with.
- [Optional] Apply a price adjustment.
- Click the type of price adjustment: Set, $, %.
- Set - Manually enter a new price.
- $ - Specify a dollar amount to add or deduct from the base price.
- % - Specify a percentage value to add or deduct from the base price.
- Click Save.
When you have shared a new product or package with a hub, it will not immediately be displayed in their storefront. The hub will need to add the product to one or more of their price lists first. You will need to contact the hub to let them know you have shared new products with them.
Apply a markup to shared products as a vendor
- On the Products page, click the dot menu for a product.
- Click Edit product.
- Click the Product sharing tab.
- Click the toggle to enable the Hub price adjustment controls.
- Click the type of price adjustment: Set, $, %.
- Set - Manually enter a new price.
- $ - Specify a dollar amount to add or deduct from the base price.
- % - Specify a percentage value to add or deduct from the base price.
- Click Save.
Export a pick list or orders list as a vendor
If you are familiar with the 1.0 exports, note that there are some differences. The differences are:
- Additional data points
- Different column ordering
- Minor terminology changes (e.g. price list instead of catalog)
See Orders in 2.0 for how to export the data.
Invite the hub to your account
See Add a user to your account.