
Photos are often the first thing customers notice on your storefront. Good product images help customers understand what they're buying, including size, cut, and freshness. That builds confidence and cuts down on questions and complaints after delivery.
This article covers how to add and manage product photos, and how to take photos that work well online.
Image requirements
- Up to 5 images per product
- Supported formats: JPEG, JPG, PNG, and HEIC
- Maximum size: 10 MB per image
- Best shape: square
Square images with smaller file sizes work best. They display consistently on your storefront and load quickly, especially for customers on mobile.
Adding photos to a product
- Go to the Products page and click the product name or the Edit button on the row to edit the product (or click New Product)
- In the Images section, drag and drop your images, or click Add images to choose files
- Click Save
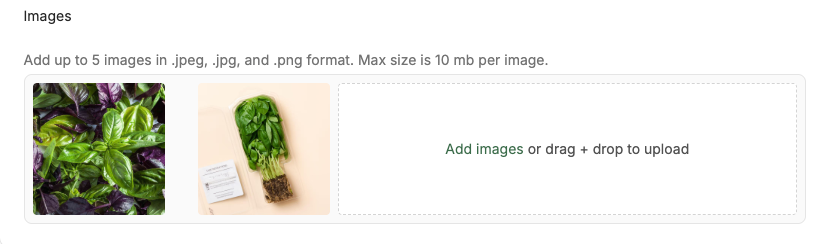
If you imported your products, they won't have photos yet. Open each product and add images using the steps above. See Bulk import & export of products.
Changing the order of photos
The first image is the main photo customers see on your storefront. To change the order, click and drag the images into the order you want in the Images section, then click Save.
Removing a photo
- Open the product
- In the Images section, remove the image you no longer want
- Click Save
Resizing large images
If an image is too large or slow to load, resize it before uploading. Most phones and computers have built-in tools for this. Search online for instructions for your device, such as "resize photo iPhone" or "resize image Windows."
Tips for great product photos
- Use natural light. Shoot near a window or outdoors in shade. Avoid harsh direct sun and flash.
- Keep the background simple. A plain surface like a wood table, a cutting board, or a neutral cloth keeps the focus on the product.
- Show the actual package. If customers are buying a 5 lb bag, show the 5 lb bag. Customers should be able to picture what will arrive.
- Add a sense of scale. Include a hand, a common object, or a measuring cup so customers can judge size.
- Use extra photos to answer common questions. A close-up of marbling, the inside of a cut squash, or a product in use answers questions before customers ask.
- Shoot in square format. Framing photos square from the start means nothing important gets cropped and less effort editing photos later.
- Keep photos current. Update images when products change with the season or your packaging changes.
If you don't have photos ready yet, free stock photo sites can work as a temporary placeholder. Your own photos are always better, though, because customers want to see what you grow and make.
Photos for boxes
Boxes have their own Images section with the same requirements. See Box Builder.
What's next
- Adding & editing products: set up the rest of your product details
- Customizing your storefront: adjust how products are displayed
- Storefront setup & settings: get your storefront ready to open
Need help? Contact support@localline.ca or use the in-app chat.