
Categories group the products on your price list into sections, like "Vegetables," "Meat," or "This Week's Specials." They make your storefront easier to browse, especially as your product list grows.
Each price list has its own categories, so you can organize retail and wholesale storefronts differently. This article covers how to create and reorder categories, sort the products within them, and edit or delete them.
How categories work
- Categories appear on your storefront in the order you set, each with a header and an optional description. Categories are also shown as filters to help customer narrow-down their search.
- Within each category, products can be sorted automatically or in an order you choose
- Products that aren't in a category go into Uncategorized
- A product or package can be in more than one category. For example, a product can appear in both "Vegetables" and "This Week's Specials."
Uncategorized products still appear on your storefront by default. If you've turned off Uncategorized Product Visibility in the price list's Visibility Settings, they're hidden until you assign them to a category. See Creating & editing price lists.
Creating a category
- On the Price lists page, click Products for the price list (or click its dot menu and select Edit products)
- Click Edit categories
- Click + Add category
- Enter a Category name (required)
- Enter a Description (optional). It appears under the category header on your storefront, for example "Picked this morning" or "Frozen, vacuum-sealed cuts."
- Choose how products in the category are sorted. See "Sorting products within a category" below.
- Click Save
Repeat for each category you need. Categories are not shared between price lists.
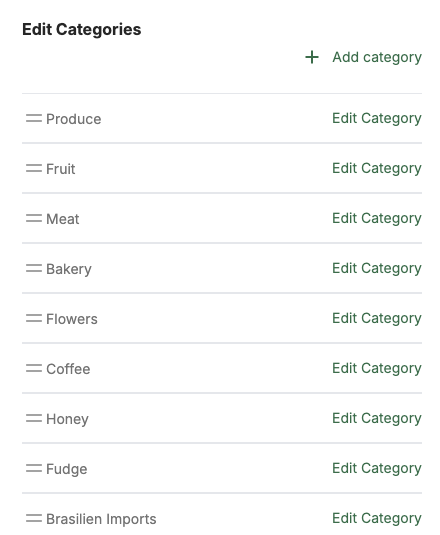
Reordering categories
Categories appear on your storefront in the same order as in the Edit categories window.
- On the Price lists page, click Products for the price list (or click its dot menu and select Edit products)
- Click Edit categories
- Drag the handle on the left of a category row to its new position
- Click Save, or click Cancel to discard your changes
Categories are always manually ordered, there is no automatic sorting option.
Tip: Put your most popular or seasonal categories at the top. Customers see them first.
Assigning products to a category
Products added to a price list go into Uncategorized until you assign them a category. A package can be in more than one category, and it appears in each one on your storefront. Adding a package to a category never removes it from the categories it's already in.
Adding one package to categories:
- On the Price lists page, click Products for the price list (or click its dot menu and select Edit products)
- Click the dot menu for the package
- Click Move to category
- Select one or more categories
- Click Save
Adding or removing many packages at once:
- On the Price lists page, click Products for the price list (or click its dot menu and select Edit products)
- Select the packages you want to update, or click Select all
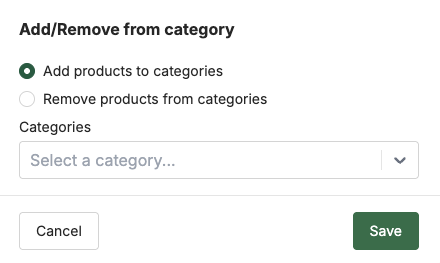
- Click Add/Remove from category
- Choose whether to add the packages to categories or remove them from categories
- Select one or more categories
- Click Save
Removing a package from a category doesn't remove it from your price list. If it's no longer in any category, it becomes uncategorized.
Removing one package from a category: select just that package, then follow the steps for many packages.
You can also choose categories for a product when you create or edit it, in its Add Product to Price Lists section. See Adding & editing products.
Tip: Putting a product in a featured category, like "New This Week," while keeping it in its regular category lets customers find it either way and increases visibility.
Sorting products within a category
Each category has its own sorting setting. To change it:
- On the Price lists page, click Products for the price list
- Click Edit categories
- Click Edit category beside the category you want to change
Automatic sorting
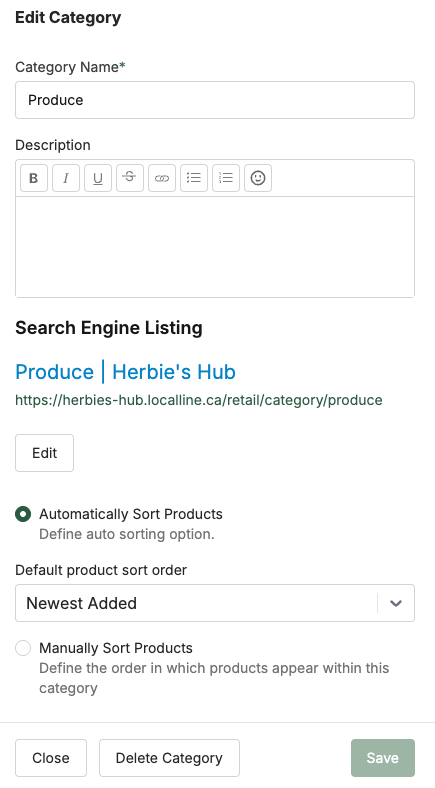
Select Automatically Sort Products, then choose an order:
- Alphabetical, A to Z (default)
- Alphabetical, Z to A
- Lowest to Highest Price
- Highest to Lowest Price
- Newest Added
- Oldest Added
Click Save. Products currently in the category are reordered, and new products are sorted automatically as you add them.
For price sorting, LocalLine uses the price of the product's first package on this price list. For example, if a product's first package is a $3.00 small bundle, it's sorted at $3.00 even if larger packages cost more.
Manual sorting
Select Manually Sort Products, then click Sort Products. In the window that opens:
- Drag products using the handle on the left of each row, or
- Click Send ↑ or Send ↓ to move a product to the top or bottom
Manual changes save automatically. Click Close, then click Save in the Edit category window.
Keep in mind:
- Manual sorting works for up to 50 products per category
- New products are always added at the bottom of a manually sorted category
Manual sorting works best for small, featured categories, like new arrivals or sale items. For larger categories, automatic sorting is easier to maintain.
Editing a category
- On the Price Lists page, click Products for the price list
- Click Edit categories
- Click Edit category beside the category
- Update the name, description, or sorting
- Click Save
Deleting a category
- On the Price lists page, click Products for the price list
- Click Edit categories
- Click Edit category beside the category
- Click Delete category
- Click Save
Note that the last step is required -- if you don't click Save the category won't be deleted. Any products in the category will be removed from it but will remain on the price list. If the products aren't assigned to any other categories, they will become uncategorized.
Best practices
- Keep category names short and clear. "Greens," "Root Vegetables," and "Beef" are easier to scan than long or clever names.
- Use descriptions for helpful details. Mention freshness, storage, or how products are packed.
- Create a featured category. A small, manually sorted category at the top is a simple way to highlight new or seasonal products.
- Prefer automatic sorting for large categories. It updates as you add products, so you don't have to re-sort.
- Match categories to how your customers shop. Retail shoppers may browse by product type, while wholesale buyers may prefer categories that match how they order, like "Case Packs."
What's next
- Adding & removing products from a price list: choose which products appear
- Assigning customers to price lists: control who can see each price list
- Customizing your storefront: adjust how your storefront looks
Need help? Contact support@localline.ca or use the in-app chat.