
This article walks you through creating a price list and setting it up: name and URL, payment and fulfillment options, visibility, and optional scheduled emails. It also covers editing settings later and duplicating price lists.
New to price lists? Start with What is a price list?
Before you begin
Set these up first so you can select them when creating your price list:
- Payment methods: See Accepting card & ACH payments.
- Fulfillment plans: See Setting up pickup locations, Delivery routes & zones
Creating a price list
- Go to the Price lists page
- Click + Add price list
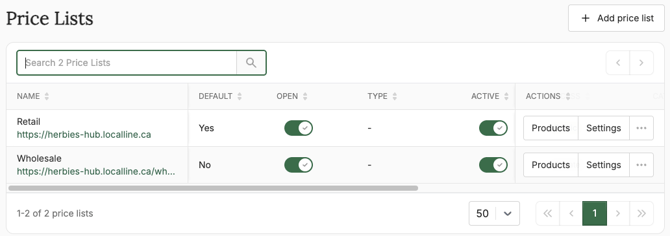
Step 1: Price List Info
- Price list name (required): for example, "Retail," "Wholesale," or "CSA Members"
- Price list URL slug (required): a short word added to the end of your store URL, such as "wholesale". Keep it short and descriptive as you may be sharing it with customers so they can access the price list directly
- Description (optional): helps customers who belong to more than one price list tell them apart
- Default price list: turn on to make this the price list that loads on your main store URL. See What is a price list? for how defaults work.
Step 2: Price List Type (optional)
Choose who the price list is for:
- Retail: for household customers and direct-to-consumer sales
- Wholesale: for restaurants, grocers, institutions, and other business buyers
- Other: for anything else, such as a CSA, a market, or a staff price list
This setting doesn't change how your price list works or what customers see. It helps LocalLine understand how you sell, so we can provide better insights and improve the platform for your type of business.
Step 3: Delivery Plans
Check each delivery plan you want customers on this price list to see. You can rearrange any enabled plans by clicking and dragging the handle on the left. Note that only plans that have at least one available fulfillment date will be displayed, and only if the customer's delivery address is within the plan's delivery area.
Step 4: Pick up locations
Check each pickup location you want customers on this price list to see. You can rearrange any enabled plans by clicking and dragging the handle on the left. Note that only plans that have at least one available fulfillment date will be displayed.
If you frequently log orders manually in the back office that use the same fulfillment plan, e.g. at a weekend market or retail pop-up, you can specify a default fulfillment plan to use for log order in the back office. When you log a new order, the fulfillment plan will be automatically selected with the first available fulfillment date from that plan.
Step 5: Payment Methods
- Check each payment method customers on this price list can use at checkout
- For each method, enter Days until payment is due:
- Leave this field empty or enter 0 to require payment at checkout
- If you want to give customers the option to place an order and pay later, enter a number of days (e.g. 30) until payment for the order will be due.
The due date counts from when the order is placed. When payment is due, LocalLine automatically emails the customer to remind them (as long as you have the Payment is overdue email notification enabled).
If you frequently log orders manually in the back office that use the same payment method, e.g. "cash", you can specify a default payment method to use for log order in the back office. When you log a new order, the default payment method will automatically be selected.
Step 6: Storefront Message (optional)
Enter a Storefront message header and a Storefront message. This appears at the top of the price list page before your products. Use it for announcements like order deadlines, pickup changes, or seasonal news.
Step 7: Storefront Banner (optional)
Upload a banner image to display at the top of this price list's storefront page. A different banner for each price list helps customers recognize where they're shopping.
Use a wide image, one that's wider than it is tall. A tall banner pushes your products further down the page, so customers have to scroll before they see anything to buy. This matters most on phones, where screen space is limited. Check how your banner looks on both desktop and mobile before opening the price list.
Step 8: Default Product Listing Format
Choose how products are displayed on this price list's storefront page:
- Grid: product tiles with photos. Works well for retail shoppers who browse.
- List: a compact list. Often faster for wholesale buyers who know what they want and order in volume.
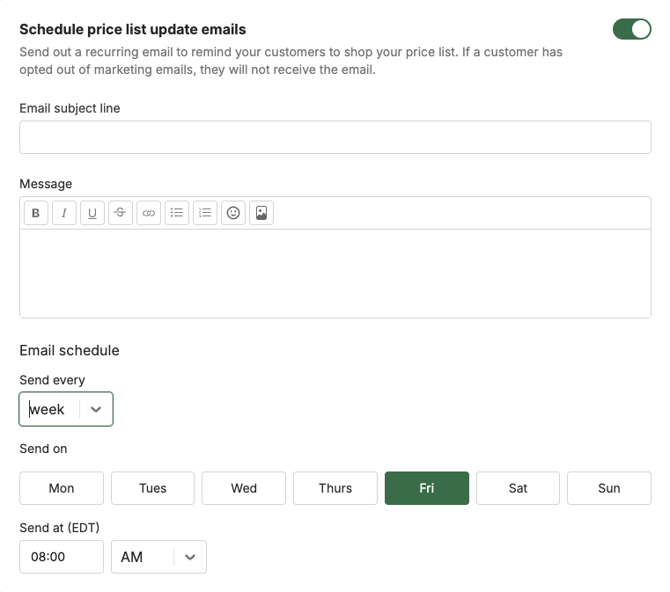
Step 9: Schedule price list update emails (optional)
Price list update emails are recurring emails that remind customers to shop. They include a link to the price list and a custom message.
- Turn on Enable price list update emails
- Enter an Email subject line. Dates in the subject line don't update automatically, so avoid them.
- Write your Message
- Set the Email schedule:
- Send every: how often the email is sent
- Send on: which day(s) of the week to send if sending weekly
- Send at: the time of day, in your local time zone
Customers can opt out of these emails at any time, either with the unsubscribe link in the email, or in their account settings in the storefront.
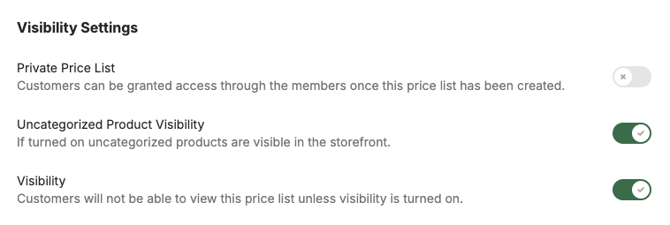
Step 10: Visibility Settings
- Private price list: turn on to require customers to request access before shopping. Leave it off for a public price list.
- Uncategorized Product Visibility: on by default. When on, products not yet in a category still appear on the storefront in a category called Uncategorized. Turn it off to hide products that haven't been added to a category.
- Visibility: enable to make this price list accessible in the storefront. Disable to make it unavailable.
Next steps after creating a price list
Your price list is created but empty. To finish setting it up:
- Create categories. See Creating & managing categories in a price list.
- Add products. See Adding & removing products from a price list.
- Apply any pricing adjustments. See Retail vs wholesale pricing.
- Assign customers if it's private. See Assigning customers to price lists.
- Open it for orders. See Opening & closing a price list.
Editing a price list
- On the Price Lists page, click Settings next to the price list
- Make your changes
- Click Save
You can change any setting from the steps above, including the name, URL slug, payment methods, fulfillment plans, and visibility.
Tip: If you change a price list's URL slug, the old link will no longer work. Update any links you've shared on your website, emails, or social media.
Duplicating a price list
Duplicating copies an existing price list, which is the fastest way to build a similar one. For example, you could create a restaurant price list from your wholesale price list.
- On the Price Lists page, click the dot menu for the price list
- Click Duplicate price list
- A copy is created and the settings are opened for editing. Update its name, URL slug, settings, and pricing as needed and click Save to save the duplicate.
Assigned products and customers are also duplicated, however subscription settings are not.
Deleting a price list
Deleting a price list is permanent, so please be sure you want to delete it. Any previously created orders will be unaffected.
- On the Price Lists page, click the dot menu on the right of the price list
- Click Delete price list
- Click Delete in the confirmation dialogue to delete the price list, or click Cancel to return to the Price Lists page
Best practices
- Use clear names and slugs. "Wholesale" and /wholesale are easier for customers and your team than "PL2."
- Keep new price lists inactive until they're ready. Set up categories, products, and pricing before you turn on Active.
- Match payment terms to the customer type. Retail customers usually pay at checkout, while wholesale buyers often expect terms like net 15 or net 30.
- Duplicate instead of starting over. If a new price list is similar to an existing one, duplicating saves time and keeps settings consistent.
What's next
- Opening & closing a price list: control when customers can order
- Creating & managing categories in a price list: organize your products in the storefront
- Adding & removing products from a price list: choose what's for sale
Need help? Contact support@localline.ca or use the in-app chat.